Let's do it together!
Step 1: Access Bookings
Open the bookings page to view all current charter bookings.

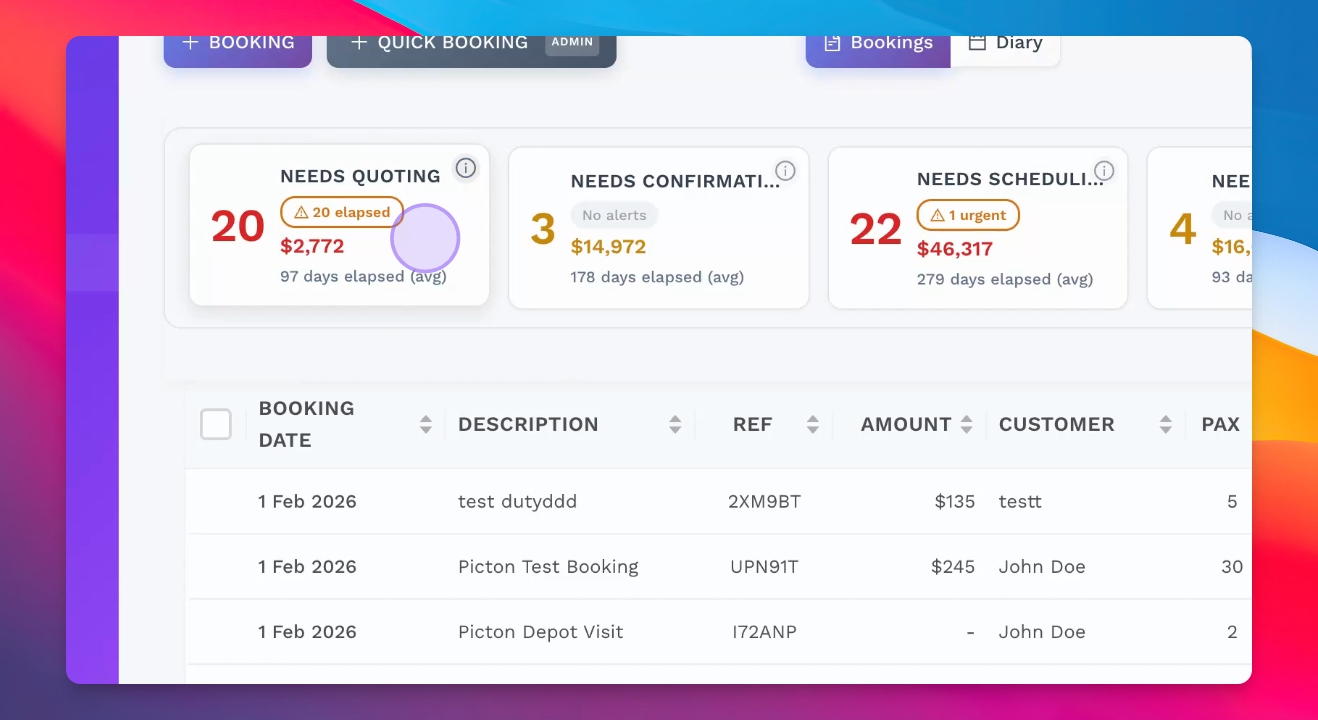
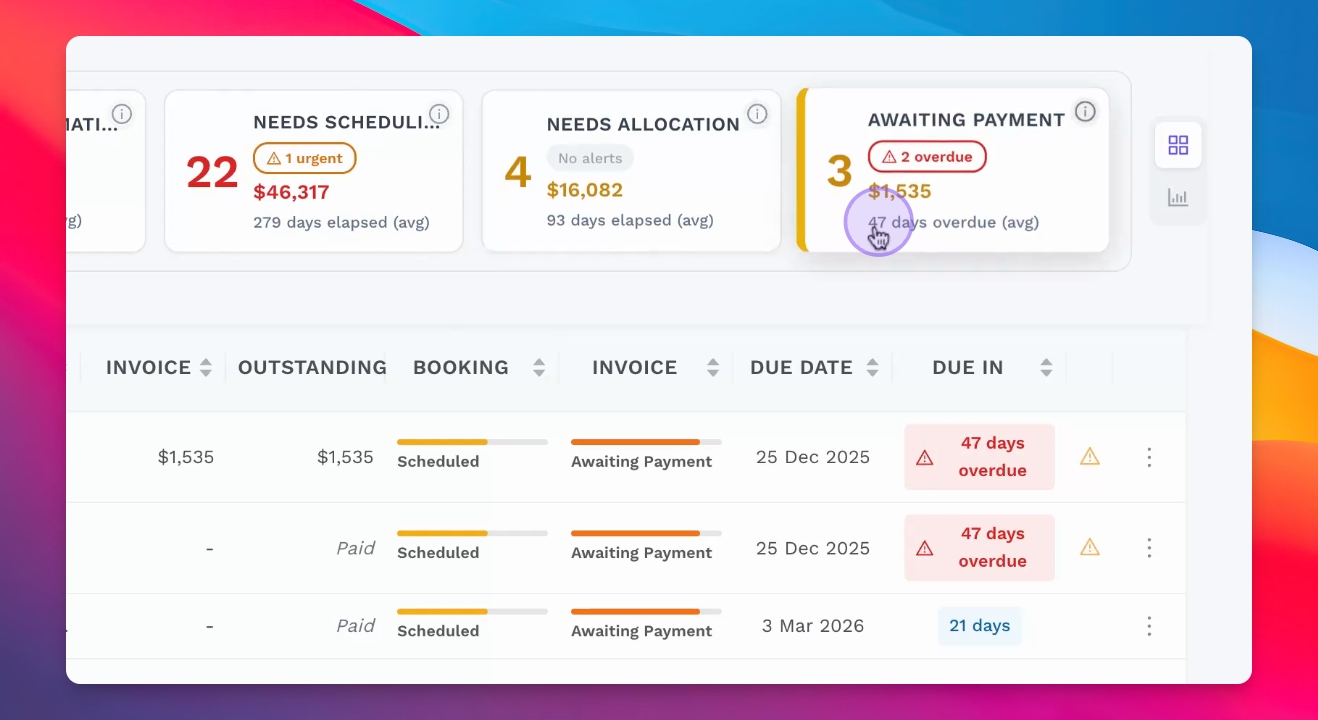
Step 2: Check Summary Menu
Use the summary menu for quick access to bookings that need attention.
Step 3: Quote Bookings
Identify bookings that require quoting and send quotes to customers for confirmation.
Step 4: Confirm Scheduling
Confirm bookings and generate driver duty sheets for the scheduled bookings.
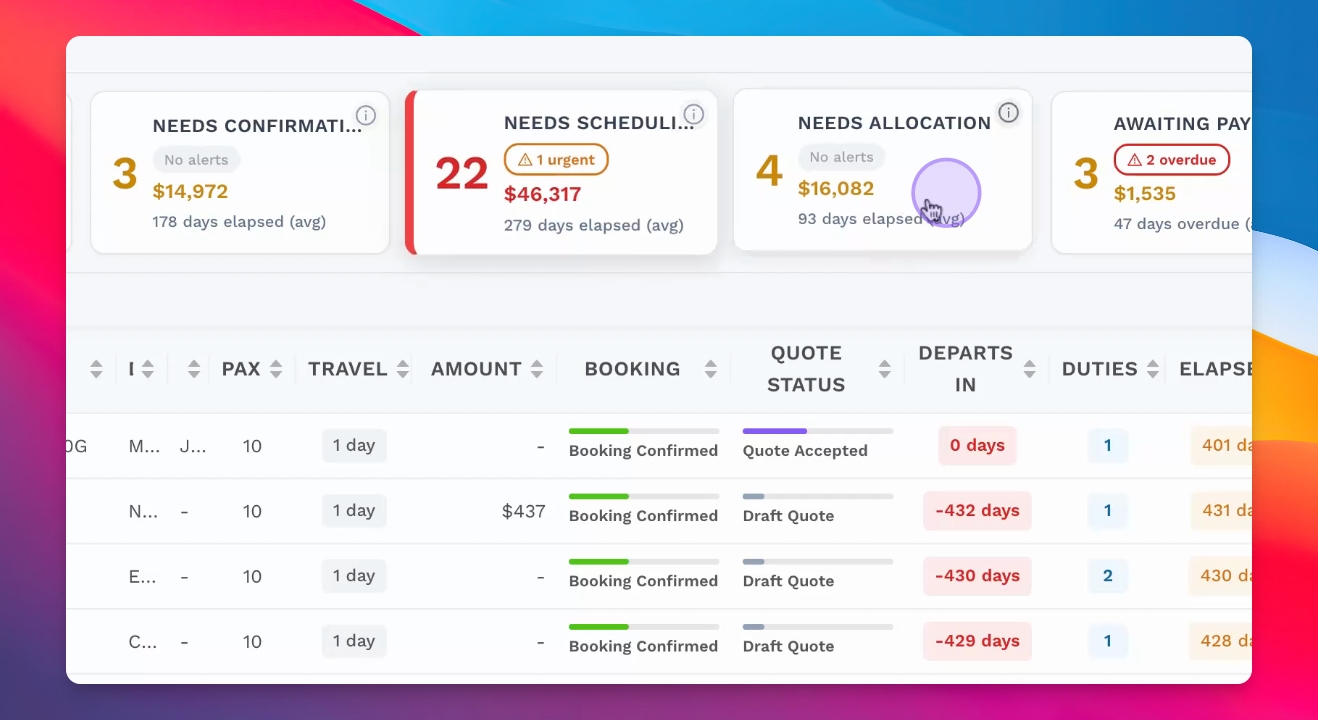
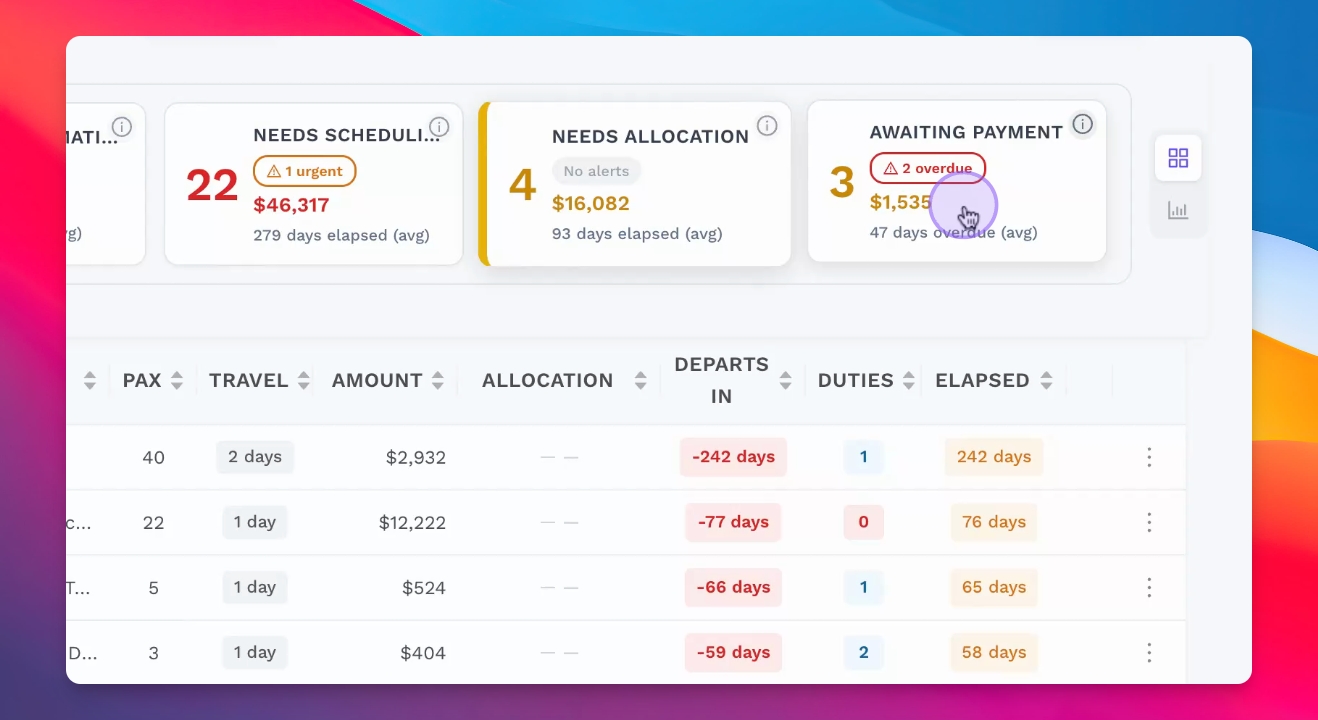
Step 5: Allocate Resources
Allocate vehicles and drivers to the jobs ready for allocation.
Step 6: Manage Payments
Ensure all payments are received for completed jobs from the accounts manager.
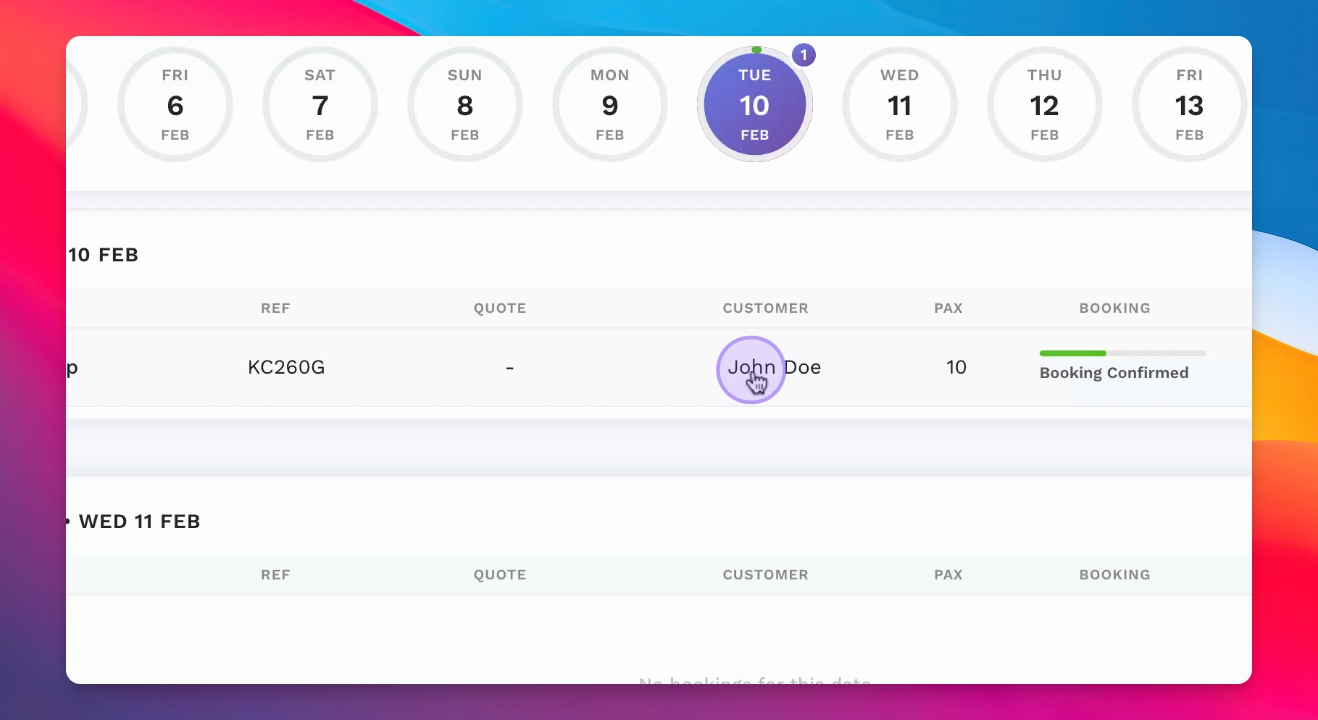
Step 7: View Booking Diary
Access the booking diary for a day-by-day view of confirmed bookings.
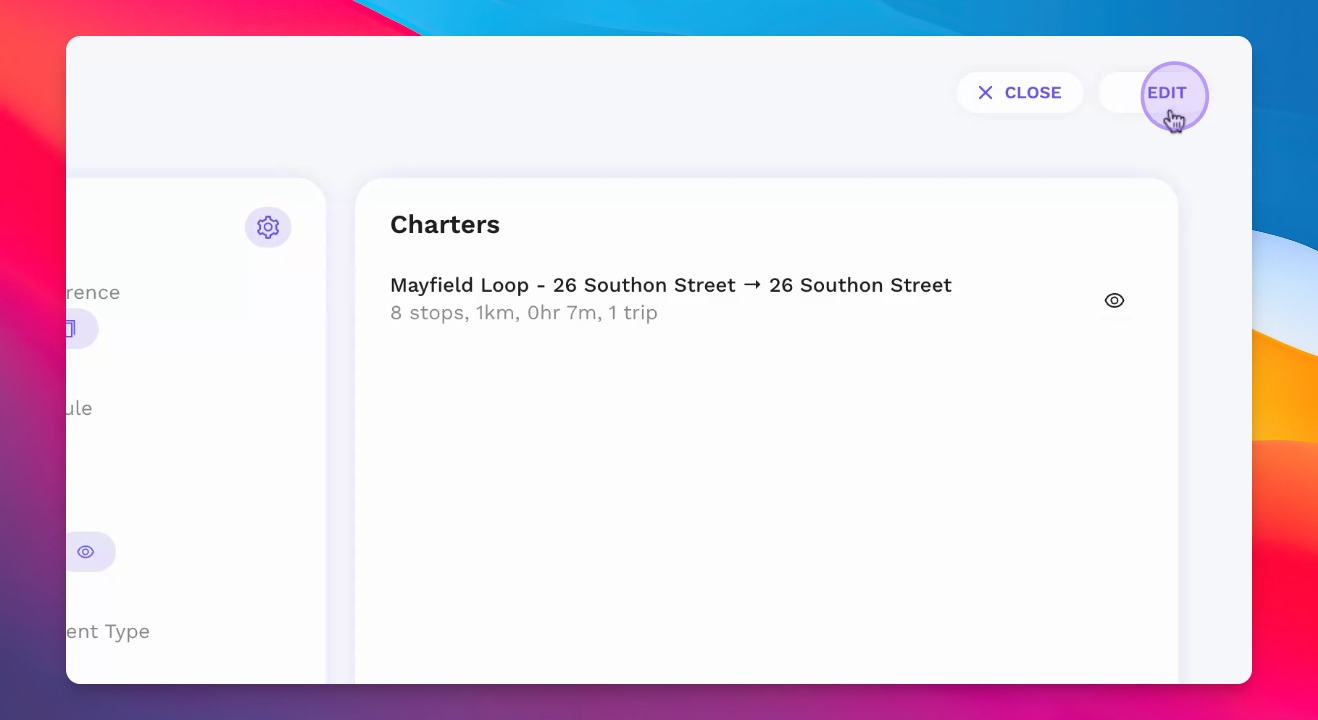
Step 8: Review Booking Details
Click into each booking to view detailed information, including itinerary and history.
Step 9: Edit Booking
Edit the booking details as necessary to ensure accuracy.
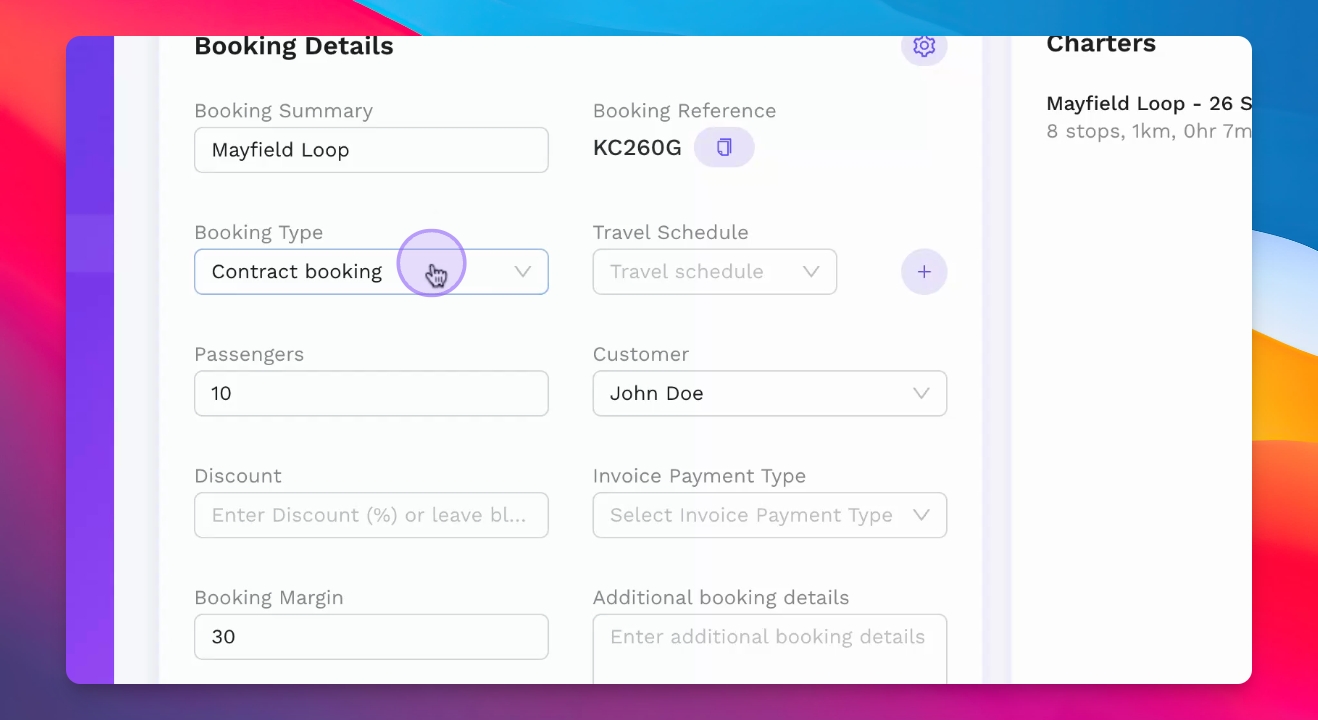
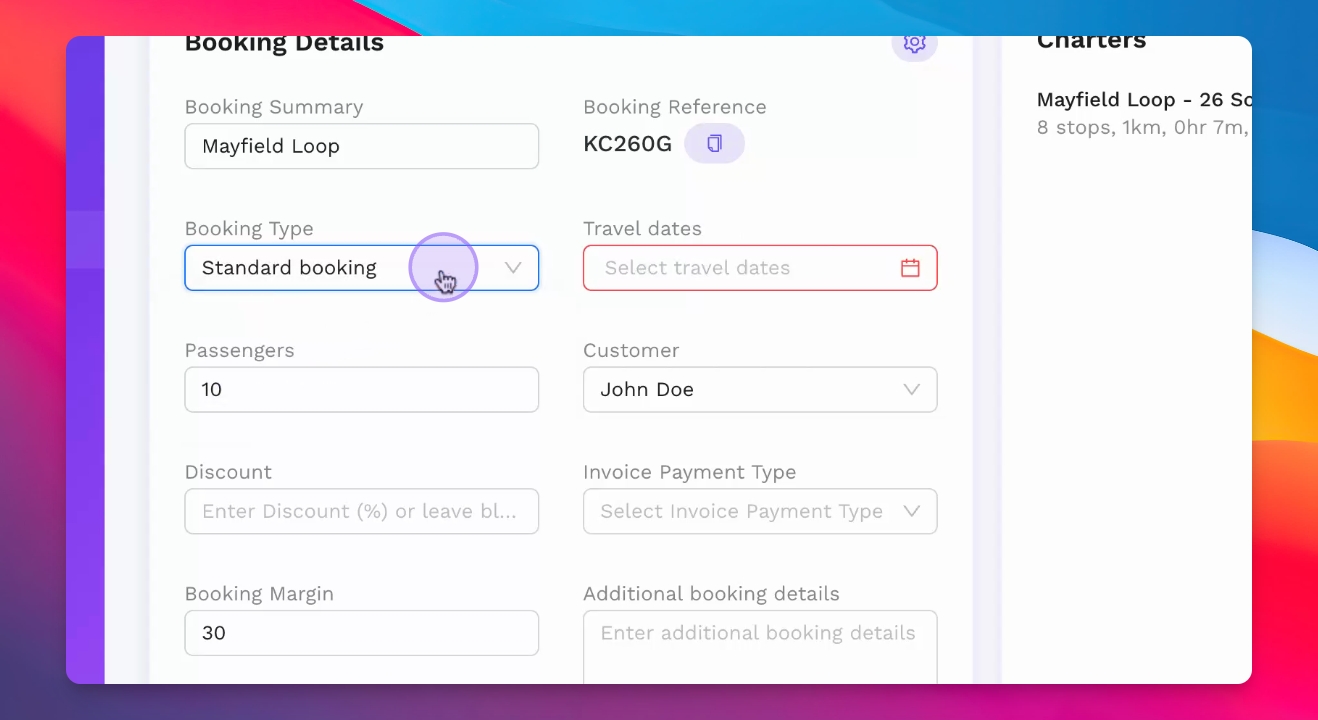
Step 10: Create Booking Types
Select the booking type, either a contract booking or a standard booking.
Step 11: Setup Contract Booking
Create a recurring booking calendar for contract bookings as needed.
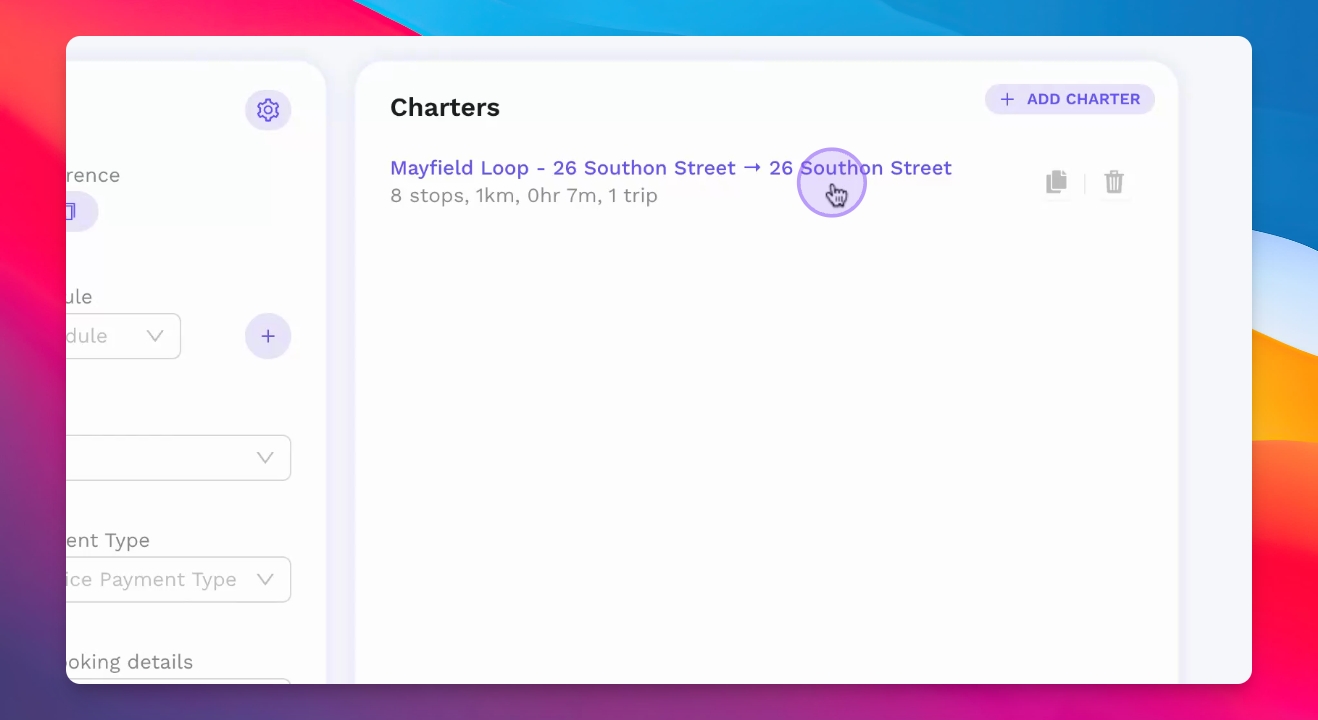
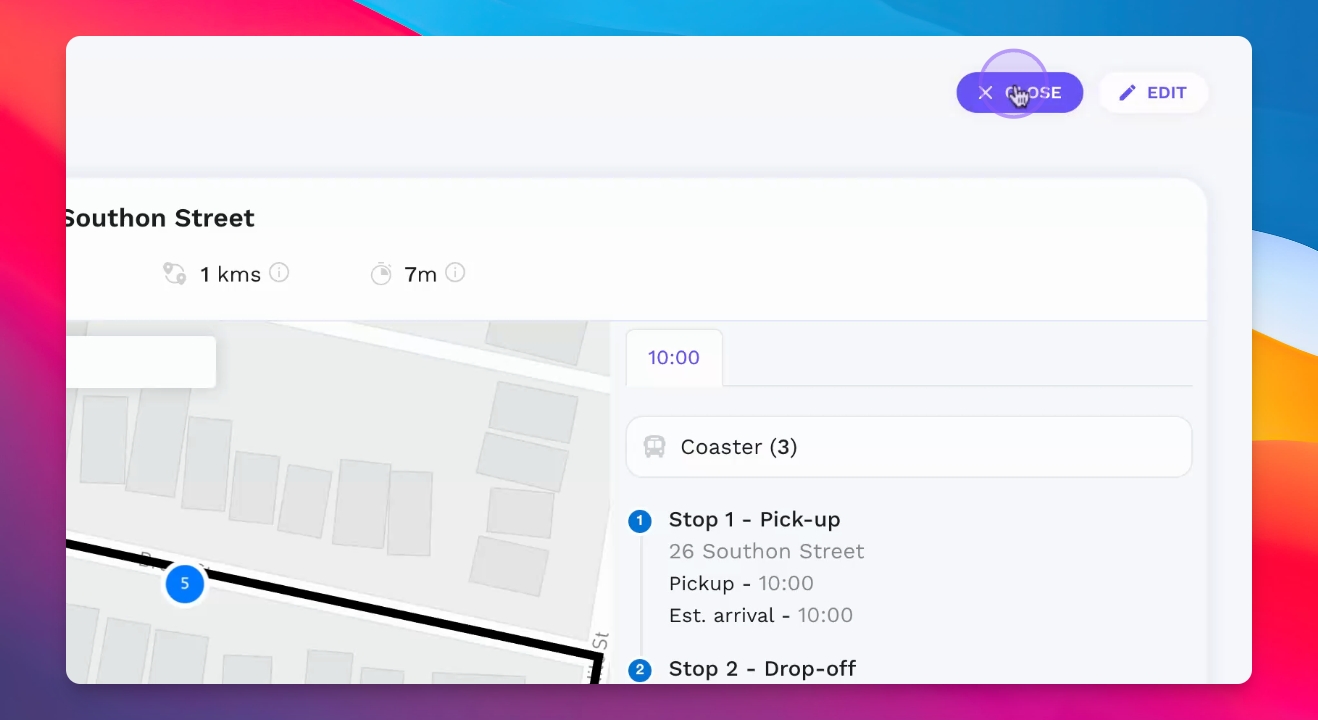
Step 12: Specify Itinerary Details
Define detailed charter itinerary information like pickup and drop-off times.
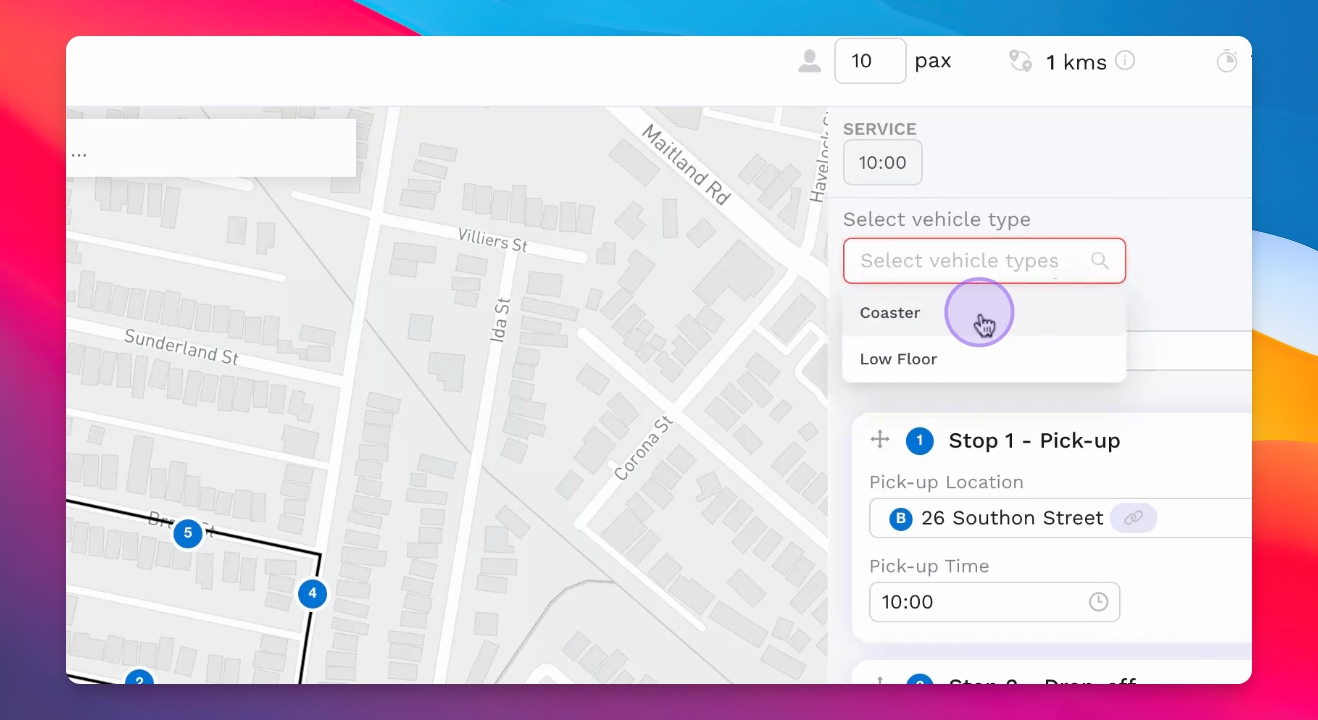
Step 13: Select Vehicle Types
Select vehicle types and specify the number needed for the charter itinerary.
Step 14: Save and Calculate Quote
Click save to run the quoting engine and calculate the quote based on details provided.
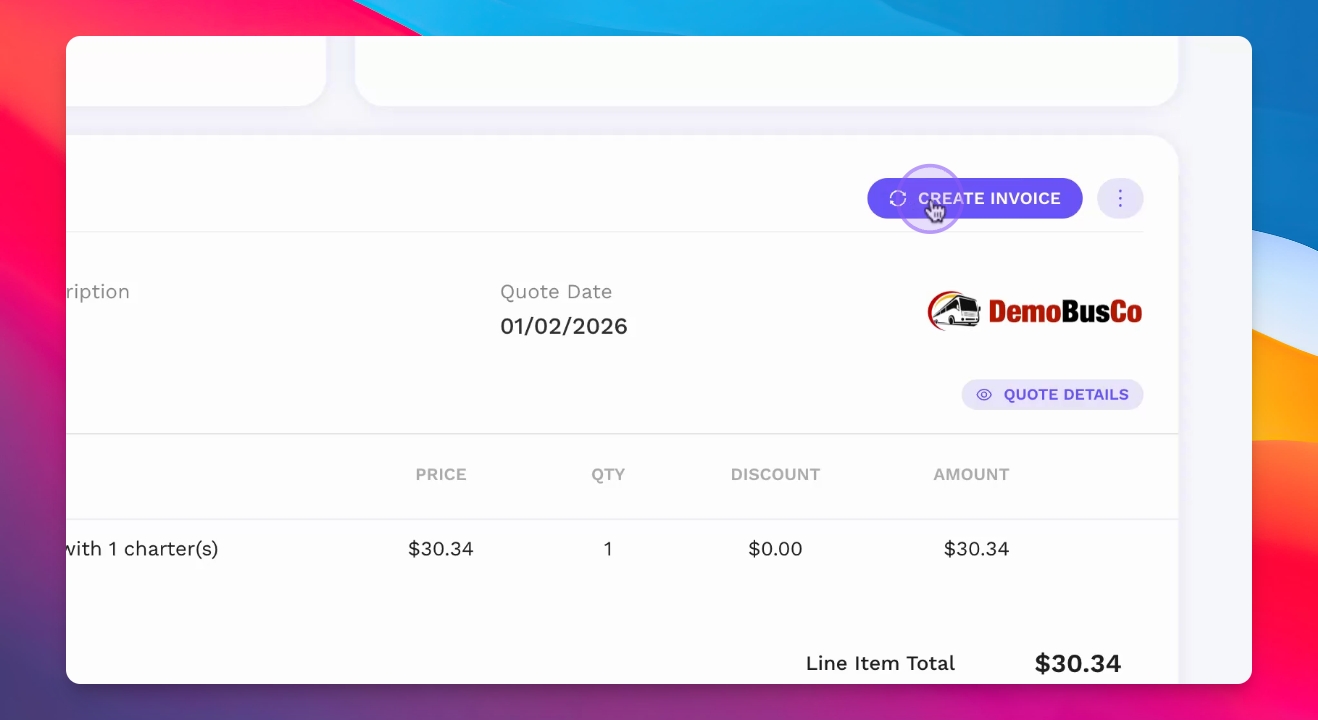
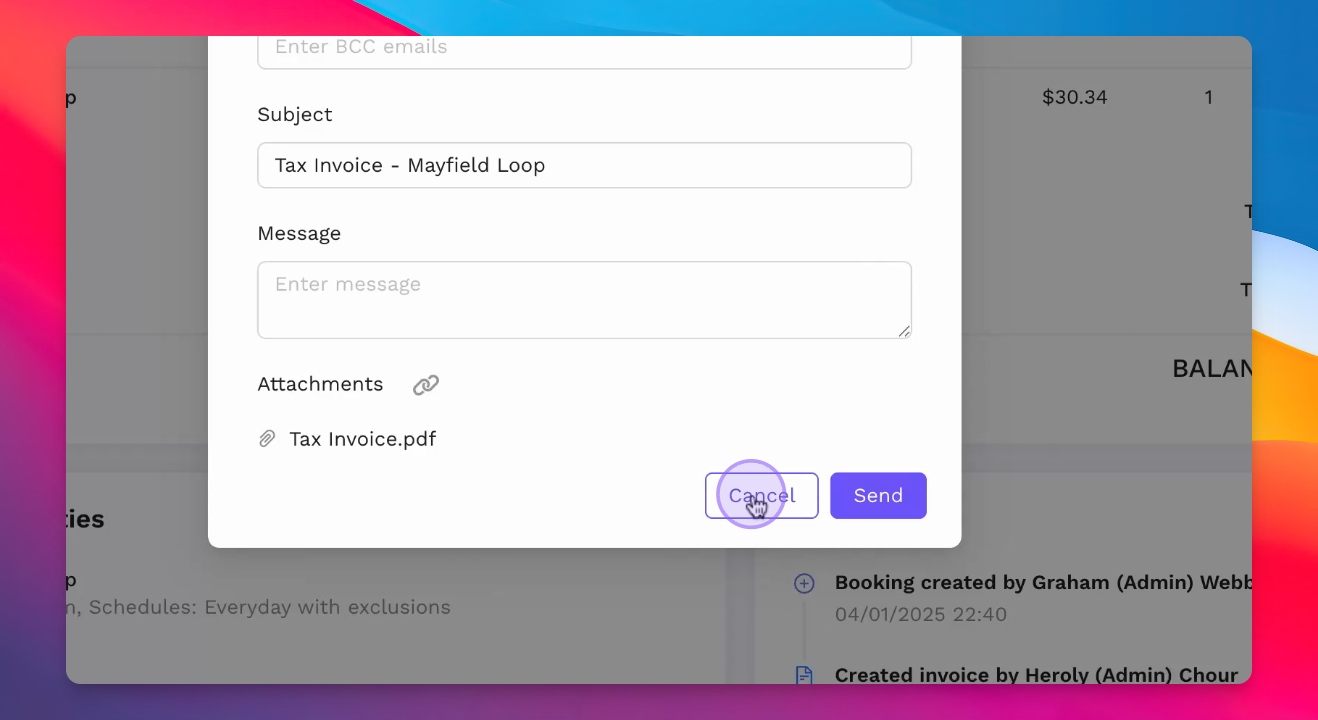
Step 15: Create Invoice
Create the invoice and send it to the customer via email after booking creation.
Step 16: Customer Payment
Wait for the customer to receive the invoice and make their payment or accept the quote.
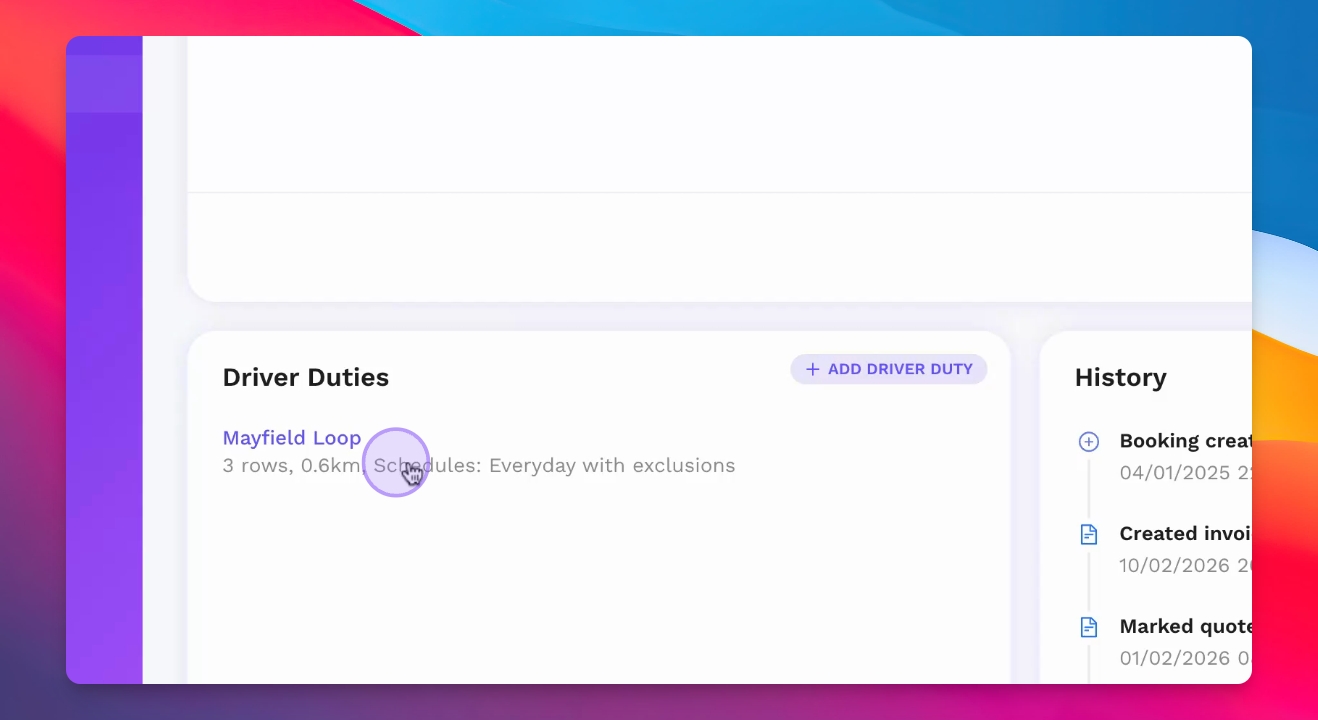
Step 17: Generate Driver Duty Sheet
Create the driver run sheet detailing the driver's schedule and distances.